Configure Synology VPN Server with Custom Domain

Probably you heard a lot about VPN services that became very popular in past several years and wondered if you need one. If you are using public Wi-Fi a lot in coffee shops, hotels, malls (you know it is dangerous, right?) or you want to get access to the content that is not accessible in your region then yes you need it. So, you can buy one of those service or if you have Synology device you can configure your own VPN Server for free. Unfortunately, your own VPN Server will address only public Wi-Fi problem, for accessing content that is not available in you region you still need to buy VPN service, unless you have Synology devices in different region.
Configure VPN Server
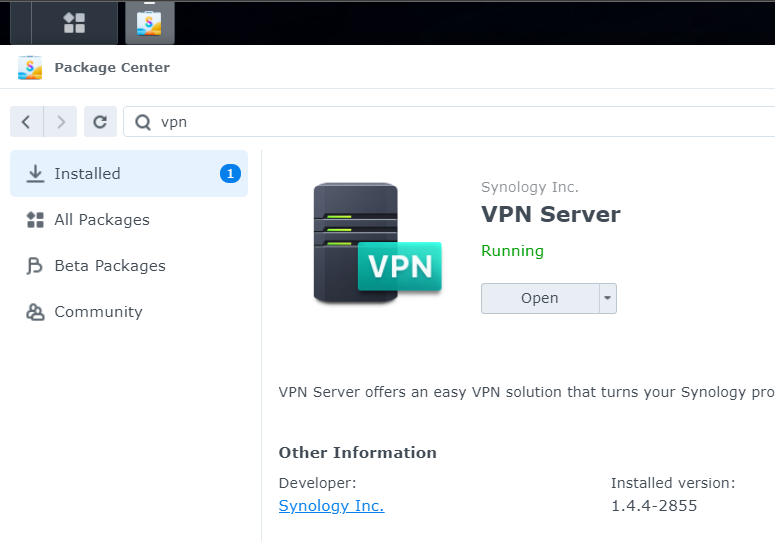
Install
First of all lets install VPN Server to your Synology device.
- Open Package Center.
- In the search box type
vpnand hit Enter or Search button. - In the result panel select
VPN Server. - And click Install button.
Configure
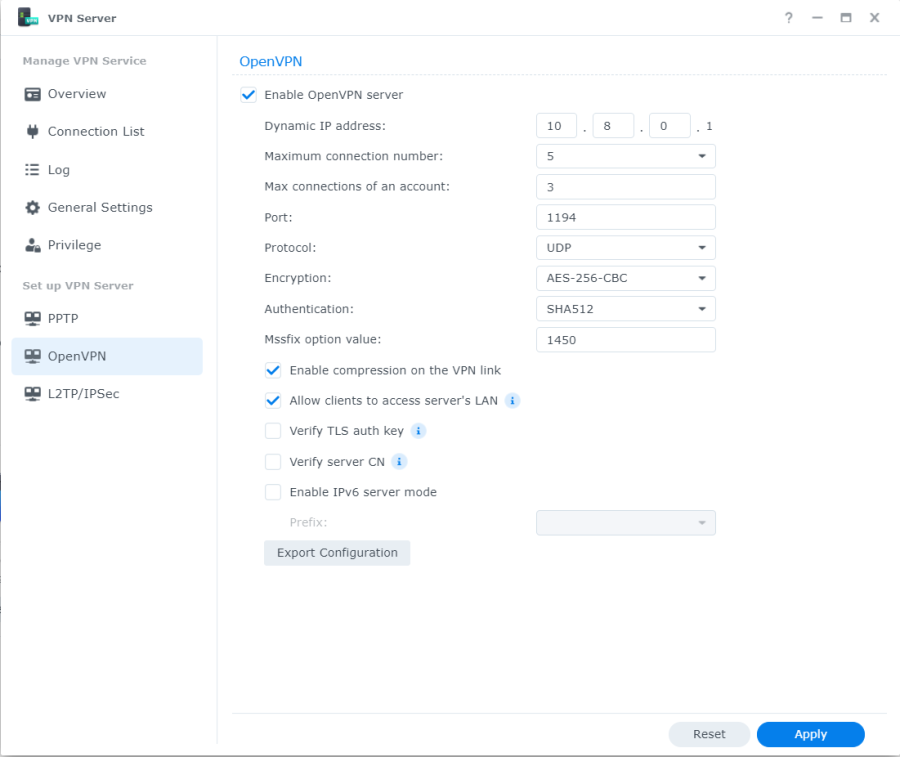
Next step is to configure VPN Server. We are going to configure OpenVPN
- Click Open button.
- Select OpenVPN menu item.
- Check Enable OpenVPN server option.
- Click Export Configuration button.
- Store that file somewhere, we will need it later.
So, basically that is it, you VPN is configured. You can play with settings, but for now we leave them as is.
Permissions
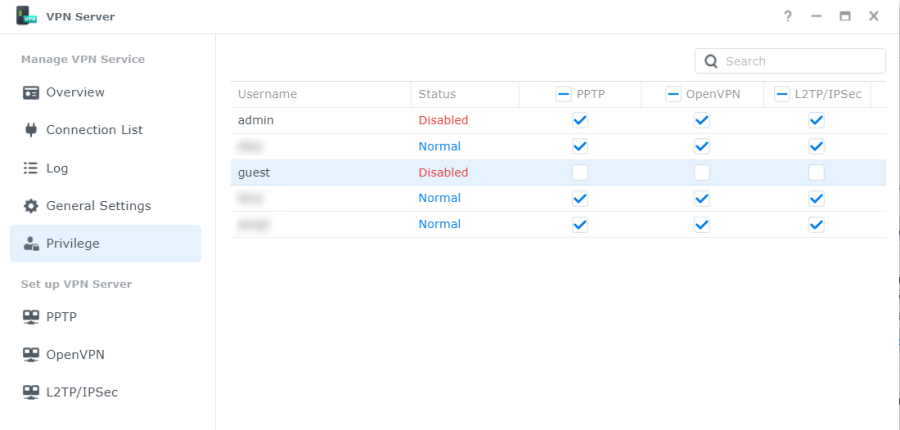
Now, we need to configure permissions for users who should have access to VPN.
- Select Privilege menu item.
- On the right panel you will see list of all users you have in your system.
- We interested only in OpenVPN option. Check OpenVPN option for all users you want to get access, and uncheck for those who should not have access.
Configure Port Forwarding
At this point your VPN Server is configured, but it is not accessible from the Internet yet. To fix that we need to configure port forwarding on your router.
If your router supports UPnP protocol you can configure your router right from Synology UI. Unfortunately, my router does not support it. If you want to use this approach just follow official documentation. Just remember when your configure ports, you local and remote ports are 1194 and UDP protocol from configuration above.
Because different routers have different way of configuring it, it will be better if you just google how to configure port forwarding on you router. On my router this screen looks like this:
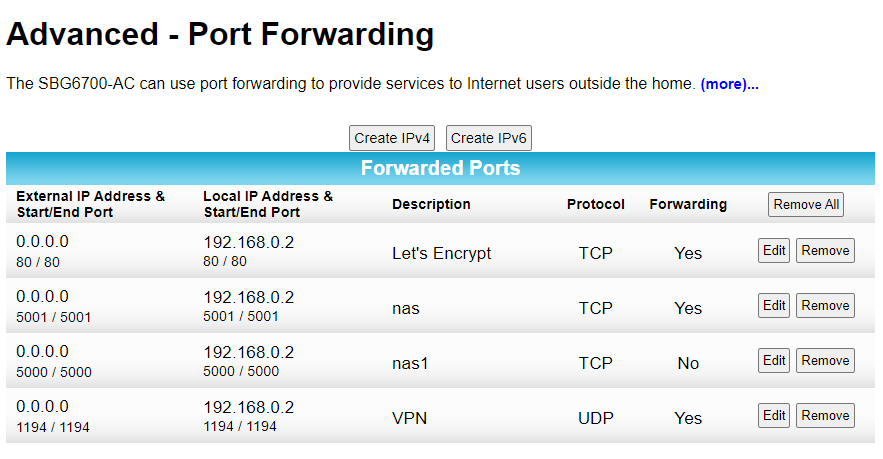
On edit dialog (the fields name can be different on you device):
- Name: VPN (can be any)
- External Ports Range:
1194(from configuration above) - Protocol:
UDP(from configuration above) - Local Ports Range:
1194(from configuration above) - Local IP Address: Enter Address of your Synology device in your network
Configure Dynamic DNS
Despite our VPN Server is accessible from the Internet. We still have one more problem to solve. We need to configure our custom domain.
For sure, you can just simply use Static IP address (you can get it from you Internet provider) instead of domain name. If you have it, you may go straight to the last part of this article and use that IP instead of custom domain address.
Configure QuickConnect
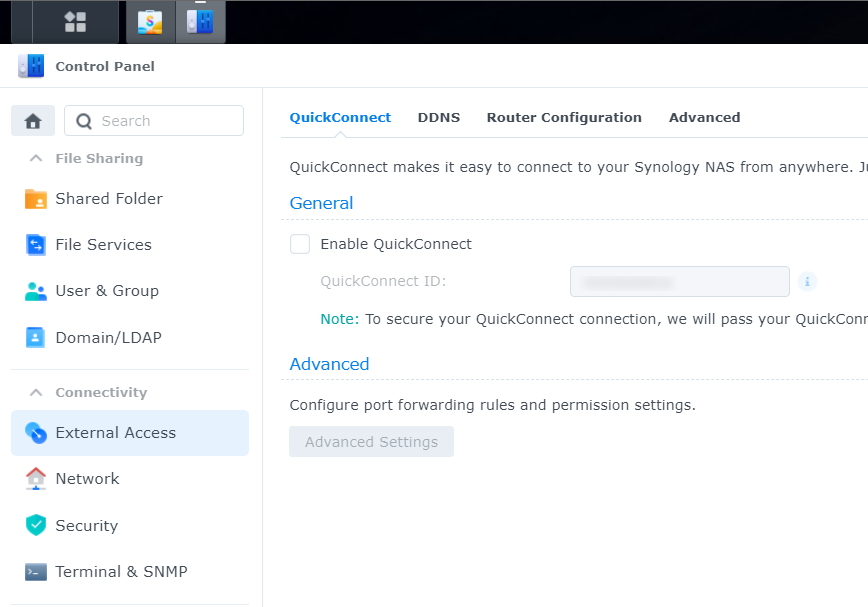
Synology has build in QuickConnect feature that serves the same purpose as custom domain, but instead it will be synology.me. To activate this feature:
- Open Control Panel.
- Select External Access menu item.
- Select QuickConnect tab.
- Check Enable QuickConnect option.
- Enter QuickConnect ID, it should be unique name.
- Click Apply button.
After that your VPN Server will be always accessible via <QuickConnect ID>.synology.me. If you used this approach you may go to the Configure Client section.
Configure Google Domains Dynamic DNS
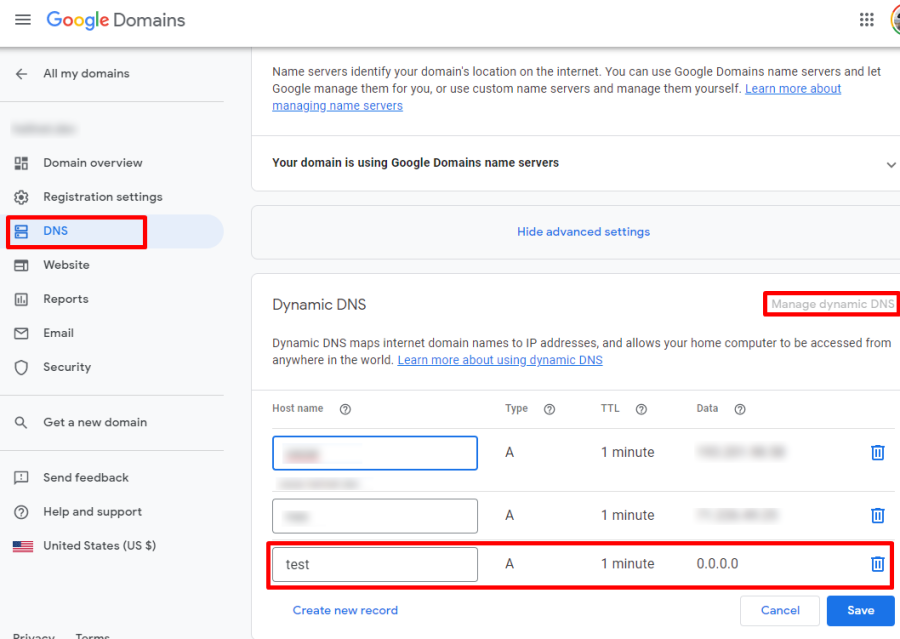
To configure our own custom domain we are going to use Google Domains. Other domain registrars have the similar process.
- Login to Google Domains.
- Select domain name (or purchase) you want to use.
- Select DNS menu item.
- Click Show advanced settings button.
- Click Manage dynamic DNS button.
- Click Create new record button.
- Enter Host Name, e.g.
nas. - Click Save button.
So, we created custom domain name e.g. nas.<you domain name> we are going to use for VPN Server.
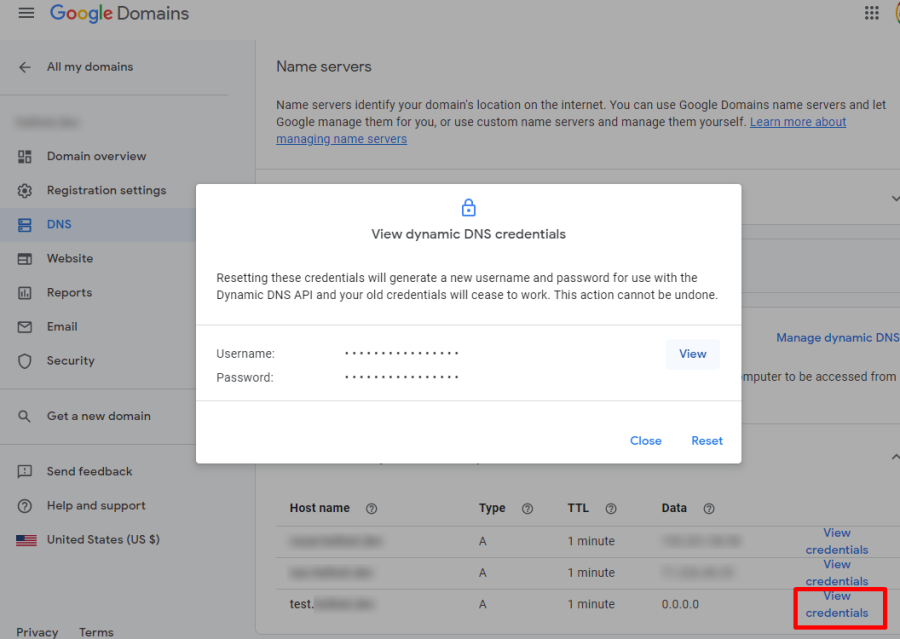
Now we need to get credentials, that Synology is going to use to constantly update our IP address.
- Expand Your domain has Dynamic DNS set up panel.
- Click View credentials button for host name you just created.
- Click View button.
We are going to use this credentials to configure our Synology
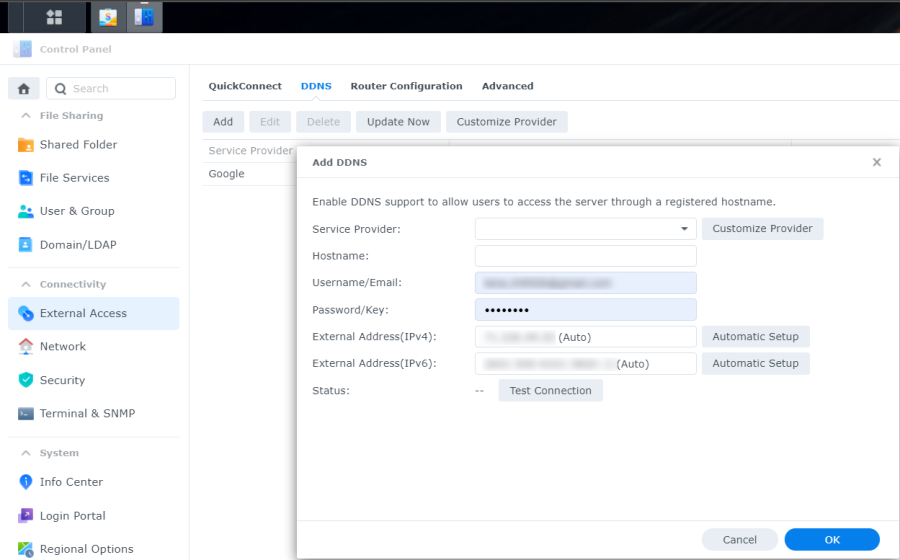
One more thing is left. We need to finish configuring DDNS on the Synology side
- Go to you Synology portal.
- Open Control Panel.
- Select External Access menu item.
- Select DDNS tab.
- Click Add button.
- In the Add DDNS dialog
- Service Provider: select
Google - Hostname:
nas.<you domain name> - Username: copy/past from previous step
- Password: copy/past from previous step
- Click Ok button
- Service Provider: select
That is it. All configuration is done.
Configure Client
Now we just need to install OpenVPN client to your device (laptop, mobile, etc) and try to connect to you VPN Server.
Prepare config file
During Installation steps we downloaded VPN configuration file
- Extract archive
- Open
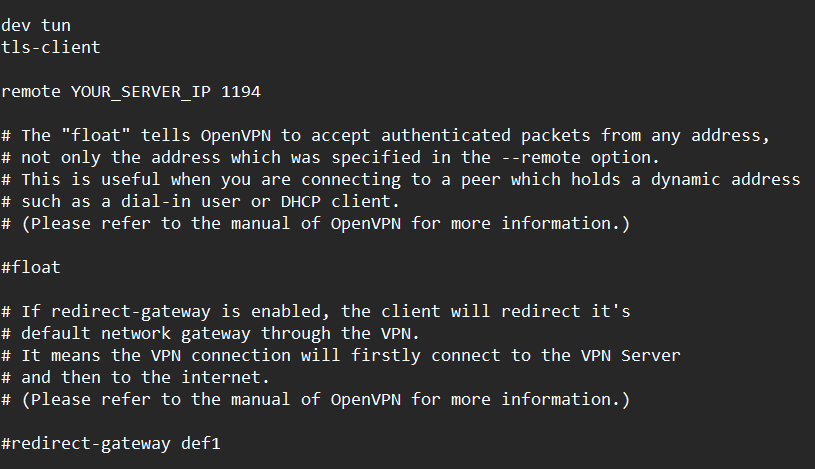
VPNConfig.ovpnfile in any text editor. - Replace
YOUR_SERVER_IPto your domain name we created on the previous stepsnas.<you domain name>. - If you want to send all traffic on you device via VPN, uncomment (remove # symbol) line
#redirect-gateway def1. - Save file.
Connect
For demo purpose I am going to use Android phone. But steps the same for Windows, Mac, Android, iPhone, etc. clients.
- Start the client.
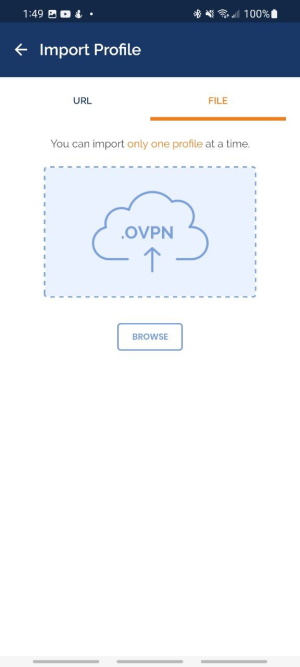
- Click + button or Import Profile.
- Select
VPNConfig.ovpnfile we prepared on the previous step.
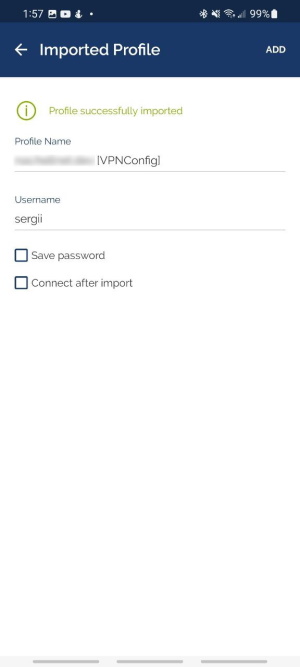
- Profile Name: enter any name
- Username: your user name. Only those users that you configured during Installation steps.
- Click ADD button.
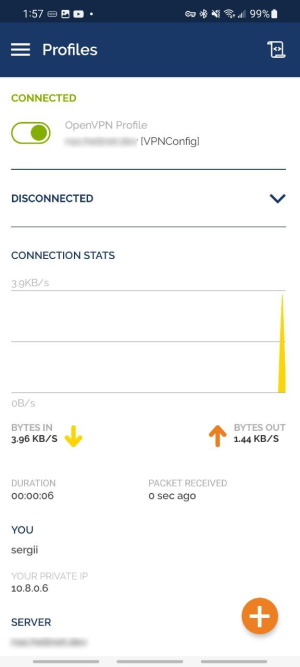
Now select just created connection and connect. If everything was configured correctly you will see CONNECTED status and that traffic is start flowing via VPN.
