Host you domain in Azure DNS

There are many cases when you want to dynamically add/remove CNAME, A/AAA records to your domain. To do that you should get familiar with yours domain registrar API (if any) and its limits (like requests per day, throttling, etc.). But, if you’re already working with Azure it is much easier to use Azure DNS zone instead, because it provides full control over your domain and familiar experience. So, lets get started.
Create Azure DNS zone
- Navigate to the Azure portal .
- On the Home screen click Create a resource button.
- In the search box type
dns zone. - Select DNS zone and click Create button.
- On the Basic tab
When DNS zone resource is created navigate to it. On the Overview page you will see list of name savers, that need to be copy/pasted to the your’s domain registrar.

Configure domain registrar
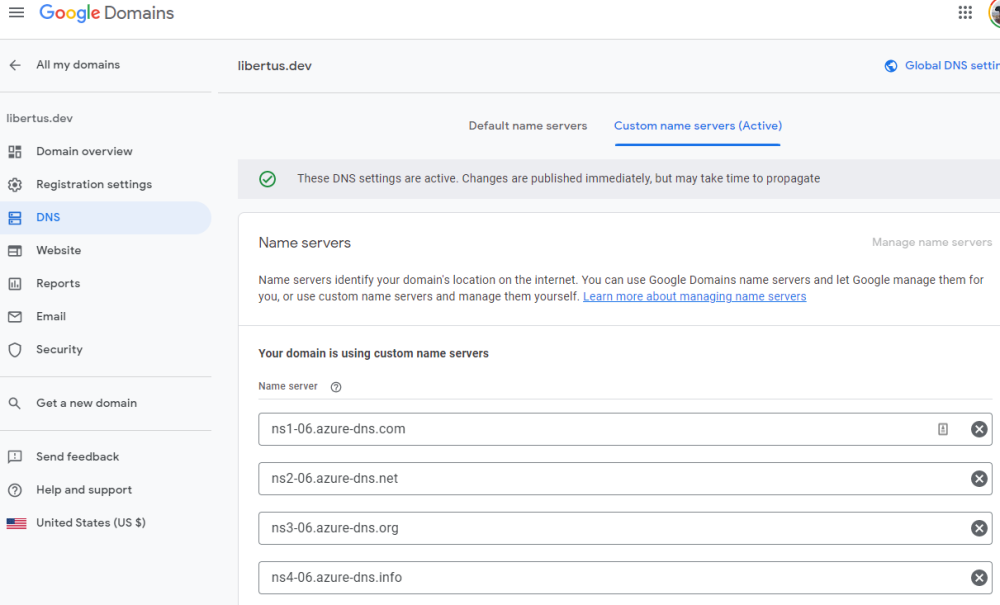
Now go to you domain registrar web site in this example Google Domains , but steps should be similar for any registrar
- Go to My Domains.
- In the My domains list select your domain.
- Go to DNS page.
- Select Custom name servers tab.
- In Name servers section click Manage name servers button.
- Click Add another name server button and add all four name servers from the Azure DNS zone resource we created on previous section.

- Click Save button.
Now you can check if name servers were applied, by calling command below:
nslookup -type=SOA libertus.dev
In the response you should see origin that points to one of the Azure DNS name servers we specified above, if it is not just try in a few minutes.
Server:         172.21.176.1
Address:        172.21.176.1#53

Non-authoritative answer:
libertus.dev
        origin = ns1-06.azure-dns.com
        mail addr = azuredns-hostmaster.microsoft.com
        serial = 1
        refresh = 3600
        retry = 300
        expire = 2419200
        minimum = 300
When configuration is applied you can control your domain via Azure portal, automate scripts and/or your application logic.